Using VC
Registration
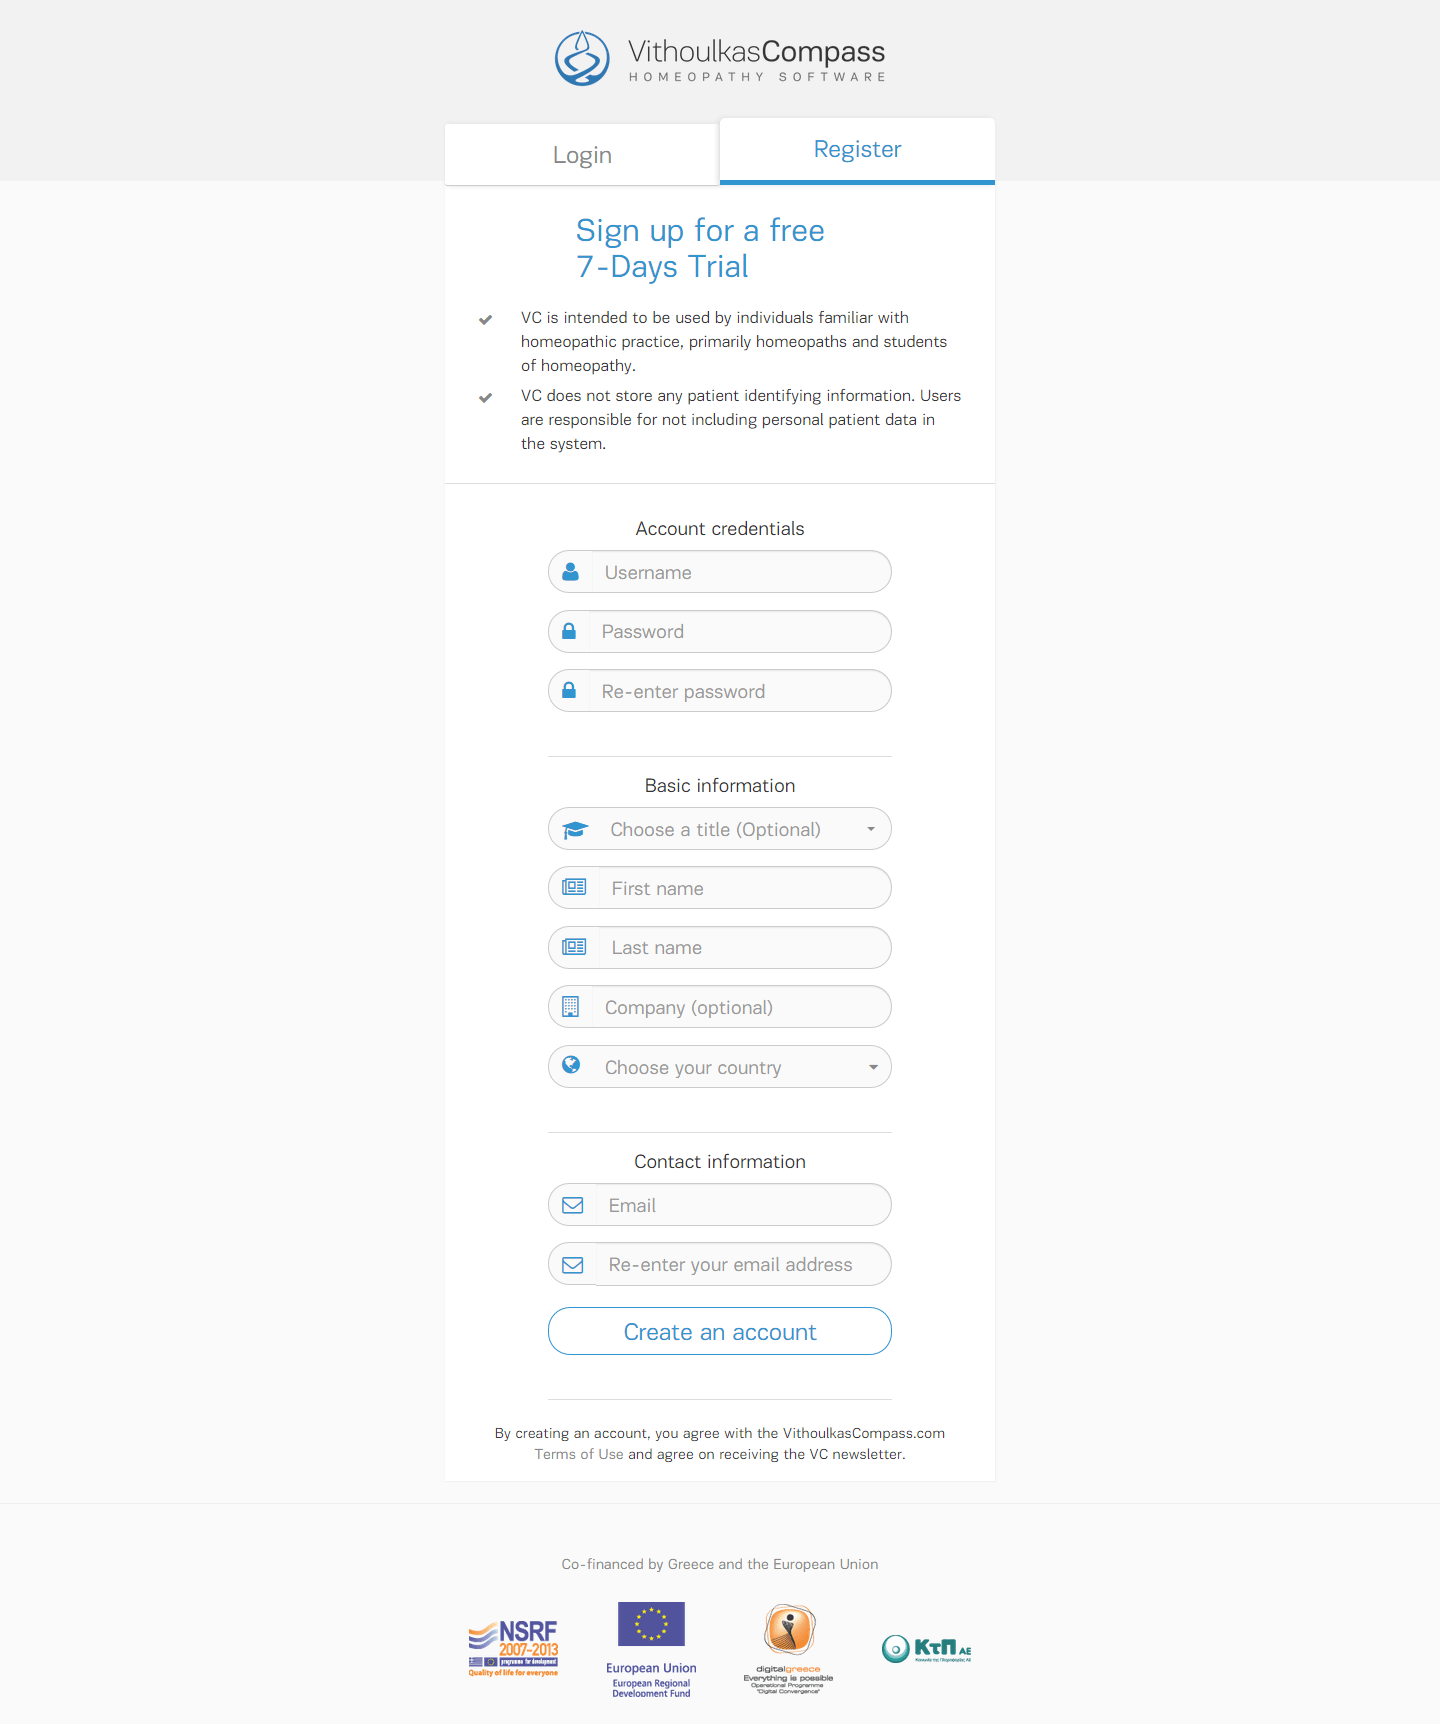
First enter our website www.vithoulkascompass.com and click Register in order to sign up for a free 7-day trial account.
Fill in all requested information in the fields of the registration form. Select your username and password carefully so as to be able to remember them as these will be your credentials to access VithoulkasCompass every day, and make sure you enter a valid email address.
Make sure you read the Terms of Use and, if you accept them, click Create an account.
To activate your account, please check your mailbox for an email invitation from VithoulkasCompass.com and follow the instructions.
Please note that e-mail and internet service providers could mark some e-mails as spam. If you do not receive the VC invitation in your inbox please check your "spam" or "junk" folder and add support@vithoulkascompass.com to your "contacts list / safe senders list". If the problem persists and you are sure you have provided a valid email address, kindly contact us for further assistance.
Login & Main VC Areas
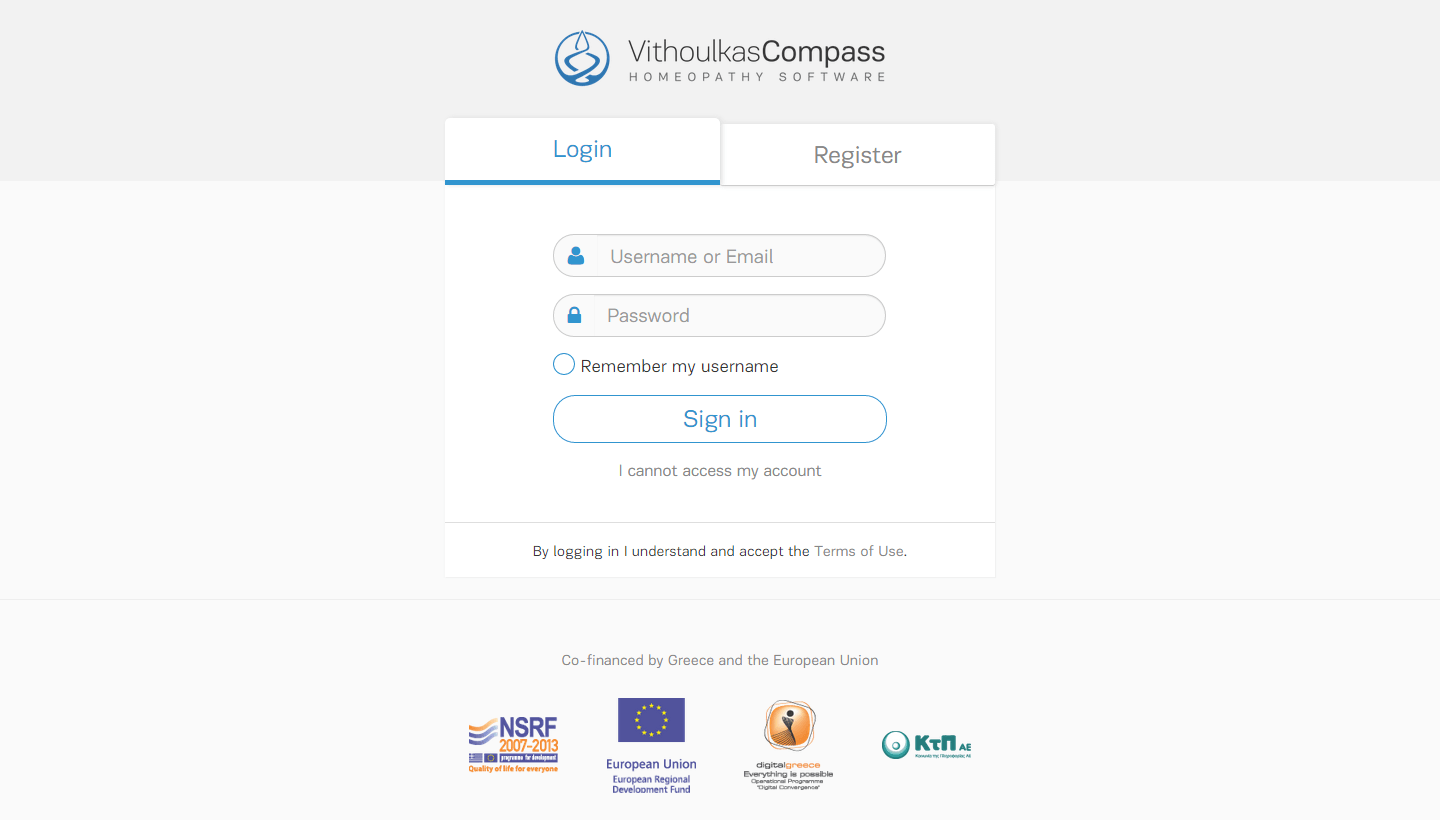
First enter our website www.vithoulkascompass.com and click on Login
Fill in your username and password, then click Sign in.
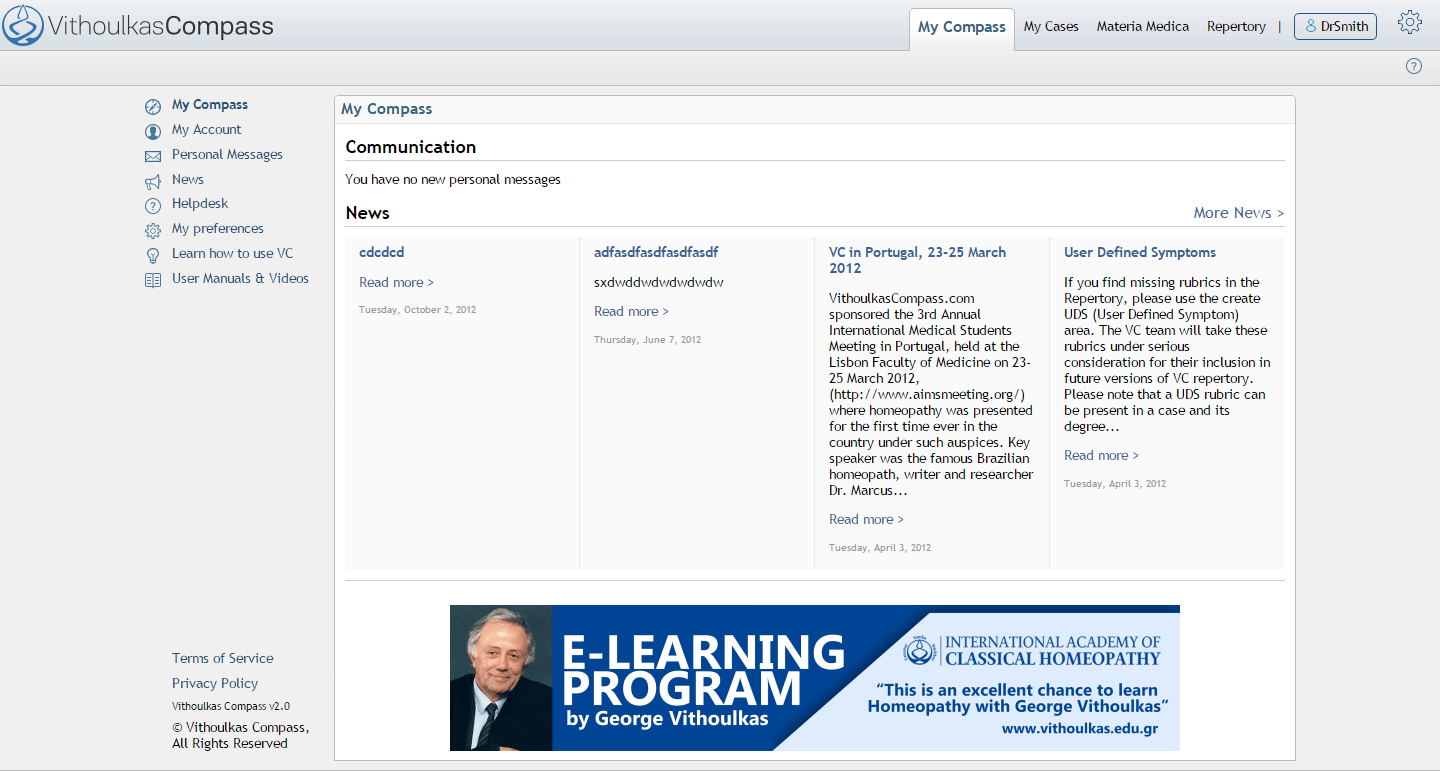
You have now entered VithoulkasCompass and you are viewing the My Compass page, which is the welcome page.
On the top of this page the tabs indicate the main VC areas
My Compass is the welcome page where news and personal messages are being displayed, as well as a menu, on the left, for accessing various VC functions for:
- your account management
- your communication within the VC system - personal messages and exchanged cases to and from other users
- News related to the system and homeopathy in general
- The helpdesk - where you obtain your technical and usage support
- your application preferences setup
- “Learn how to use VC” with our interactive tutorials
- The VC User manuals and Videos
On the top right of your window, there is a gear wheel icon  . Mouse over to quick view the expiration date of your existing subscription and the available remaining credits. You can switch the language on both the VC Repertory and the VC Interface. Currently, languages supported include German, Greek, English, Spanish, French, Italian, Portuguese and Russian. You also have the option to choose the layout of the VC interface according to your preference.
To create, open and work with a case, click on My Cases tab
To access the VC repertory independently of a case, click Repertory
To open the materia medica, click Materia Medica.
Please note:
The “Repertory” and “Materia Medica” tabs will create new browser windows so that they can be simultaneously opened and in parallel with cases.
To work simultaneously in multiple cases, you may click on  icon on My Compass and My Cases in order to open them in a new window
The repertory can be readily accessed from within cases, for browsing, searching and adding symptoms.
To exit VC, click Sign out  , under the gear wheel icon.
My Compass Menu
In the My Compass page, on the left, is the main navigation menu:
My Account – User Profile
By clicking on My Account you may access your User profile. In this section, you have an overview of your User Profile and account data.
You may change your password, your email, or edit your Personal Details.
Don’t forget to click on the Update Profile button to save your input.
My Account - Backup
In this section, you can request a backup of all your work in VC, including all cases, personal notes to the repertory and materia medica, metadata and notes on rubrics, and see your recent backup history.
My Account - Billing History
Here you have an updated summary of the credits used per VC function (“Transactions” tab) and the Purchase history of Plans (“Orders” tab)
By clicking Details, a more detailed analysis is available.
My Account – Purchase
In this section, you can complete the purchase of a Subscription Plan or extend an existing one.
Please follow the analytical instructions in order to apply a promotional coupon if available, select the plan of your preference, optionally add credits, carefully fill in your billing details and select your preferred payment method.
Once you are ready, click on the Proceed to payment button.
Personal Messages
In Personal messages you can access your message communication within the VC system – personal messages between you and other VC users - individuals or a list of recipients - and the VC system administration.
News
In News you can read news related to the system and occasionally homeopathy in general
Helpdesk
In Helpdesk you can obtain your technical and usage support.
Please enter a specific subject and select the type of question from the drop down menu.
To facilitate you the soonest possible, your message should be as clear and analytical as possible.
Furthermore, you can send your comments, suggestions and contribution to the VC project.
Once you are ready to send the message, click on the Submit button.
My Preferences
Again on the left, click My Preferences to access options and 'personalize' your account. Here is where:
- you can set your default application and repertory language
- you can set up your preferred layout of the VC interface
- you can subscribe to or unsubscribe from our newsletter
- you can set the automatic copying of received cases to your Main Cases Folder
- you can set up your preferred method of flat repertorisation
- you can enable/disable the display of evidence-based information
- You may choose the style of the Text Editor between Rich Text – (this includes - bold, italic, underlined character-formatting properties) - or you can use just Plain Text (better when using VC from tablets and mobile phones)
- You can set up the type of print header for your print prescriptions and include a customize text
- To confirm your modified preferences, click Update preferences.
In My Templates – is where you can view and manage all your personal VC Consultation Templates (Case notes) for over 15 types of cases. Click on the name of a template to view it. To disable a template, click on the ‘Disable’ button while mousing over the right side of each template. To Add a personal template, click on the Add Template button on the right top side of the pane.
In My Contacts –you can create and edit your contacts lists. Contact lists refer to groups of other VC users who would receive messages and cases from you. This feature is especially useful for teachers of homeopathy and clinics.
Learn how to use VC
Select the Interactive Tutorial you wish from the Lessons currently available, and follow the instructions to learn the basic functions of VC.
Using the VC Repertory
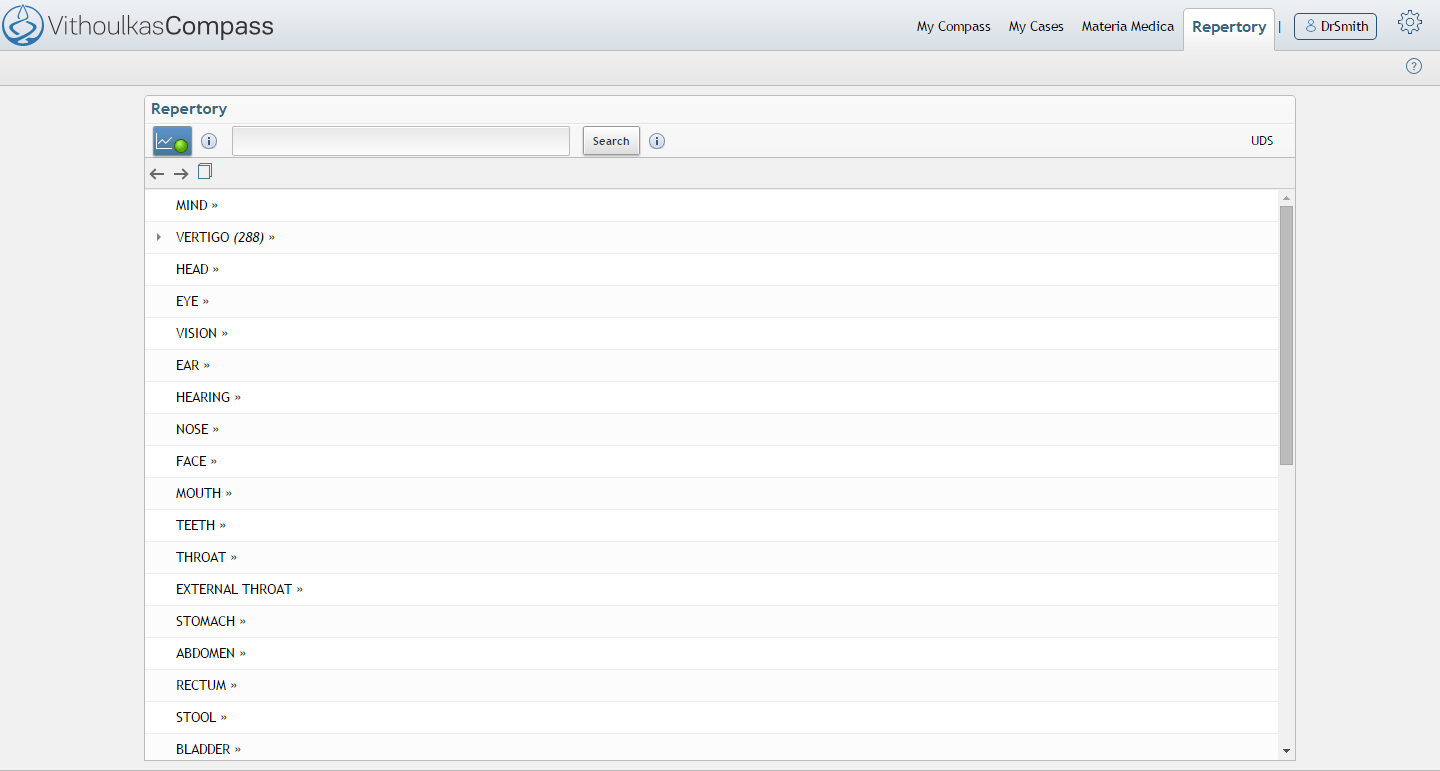
To access the Repertory page click Repertory, which will automatically open in a new window.
To browse the Repertory, click on any repertory chapter to see its contents. The number in brackets (at the end of each rubric) indicates the number of remedies present in the rubric.
Click on the arrow icon ![]() to view the remedies of a rubric.
to view the remedies of a rubric.
The appearance of the remedy degrees is as follows:
- degree 1 remedies are in plain text
- grade 2 in blue italic
- grade 3 in red bold
- grade 4 in black BOLD CAPITAL letters
Clicking on any remedy name will open the Materia Medica entry for this remedy.
The rubrics in blue color text under rubrics are the cross-references - rubrics with similar meanings: for example: MIND- Abstraction of Mind is a cross-reference to the rubric MIND –ABSENT-MINDED.
Rubrics with the double arrow » contain sub-rubrics. Click on the rubric, to see the sub-rubrics.
If you want to navigate to the previous/next repertory display use the navigation arrows 

Whenever you want to go back to the repertory chapter list, you may click on the  icon.
icon.
Whenever next to a rubric, the icon ![]() is displayed, additional information is available
is displayed, additional information is available
Whenever next to a rubric, you have added a personal note, this icon ![]() will be displayed.
will be displayed.
To access this data or add personal note to the rubric or contribute to VC, click on the icon ![]()
How to Search the Repertory
To search for a rubric - type some keywords of the rubric you are looking for, in the Search Field.
Please note that by leveraging the result of our statistical analysis (evidence-based data), the most used rubrics are displayed at the top of the results list.
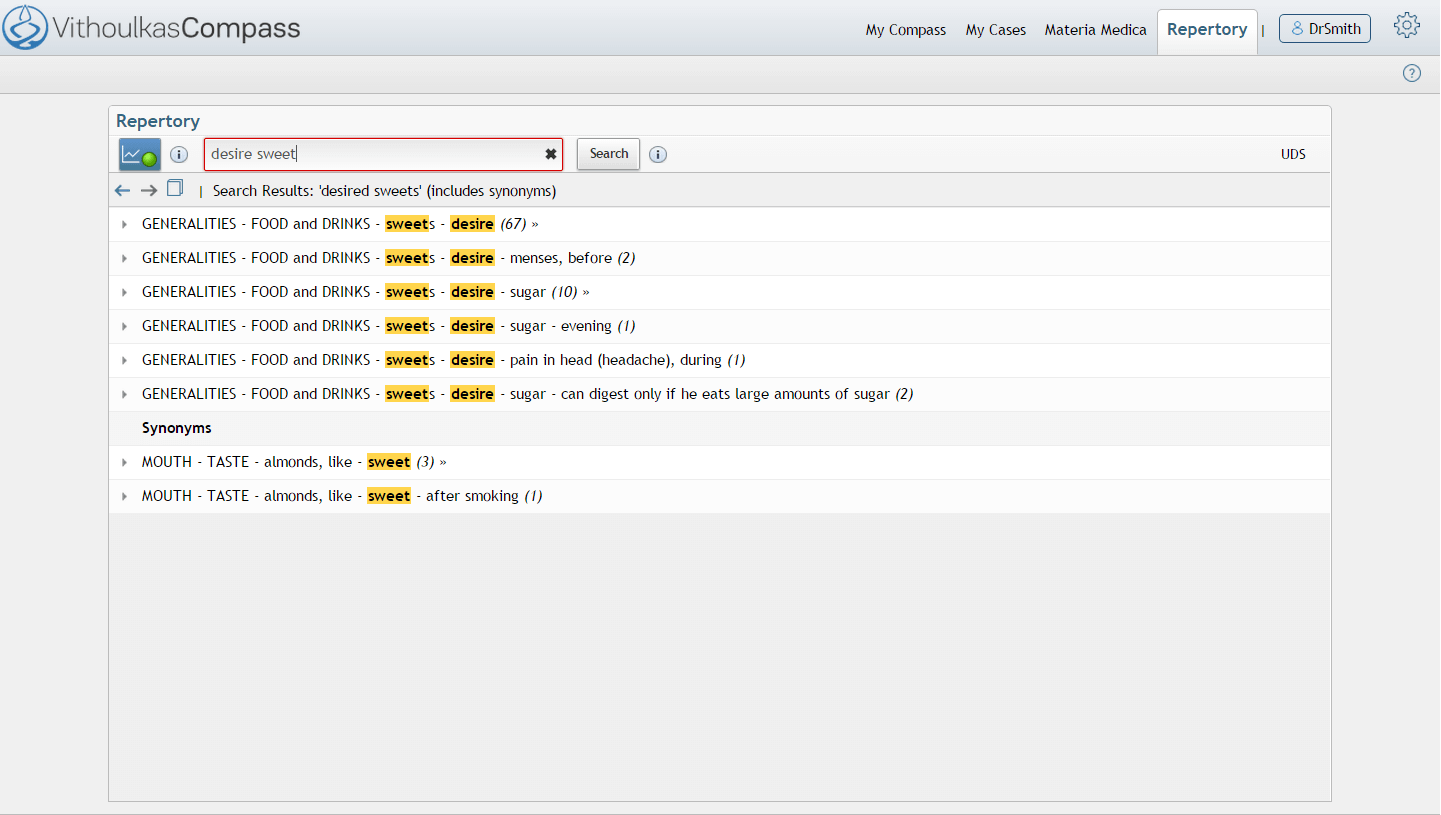
Auto-suggest function
Start typing a search term. After the first three characters, the auto-suggest function will give you a list of all terms starting with those characters.
For example: Let us say, we are looking for “desire sweets”. If you enter (the first 3 letters for the word desire - “des”, you will see a list of terms beginning with these 3 inserted characters. So select “desire”. Then enter the term “sweets”.
Click Search or press Enter and the results of your search will be displayed.
How to Filter your Search results
To further filter your search results, enter the desired characters or terms without clicking Search.
The results of your search will be displayed in a list and are ranked according to their relevance with the search terms. Your filtered selection will be displayed in yellow color.
Synonyms for your search terms
The Search results may also include results for synonyms of the provided search terms.
For example, when searching for symptoms containing the term “GUILTY”, results include rubrics containing the term, such as “MIND-ANXIETY- conscience (as guilty of a crime)”,
but also rubrics containing terms which are synonyms to “Guilty” - such as
- MIND – DELUSIONS, hallucinations, illusions – criminal, that he is a, or
- MIND – REMORSE
Enabling the evidence-based information
Click on the icon  next to the search text field to enable the evidence-based information function. When this function is activated, symptoms that have never been selected by VC users are displayed in a lighter color. Click again on the icon to disable it.
Additional Rubric Information, Online Dictionary, Translation and Reference Tool for the Repertory, Personal rubric notes, Contribute to VC project
After clicking the arrow icon ![]() on the left side to display the remedies, you can access the rubric’s additional data and tools by pressing the icon
on the left side to display the remedies, you can access the rubric’s additional data and tools by pressing the icon ![]()
If there is additional information or personal rubric notes, they will be displayed along with the following options:
- Add/Edit Personal notes
From within the personal notes function you can also contribute to the VC project.
- Online translation and reference tools
Click on the required dictionary or online translation and select the term(s). Find terms of the repertory in the VC Materia Medica books and George Vithoulkas Notes .
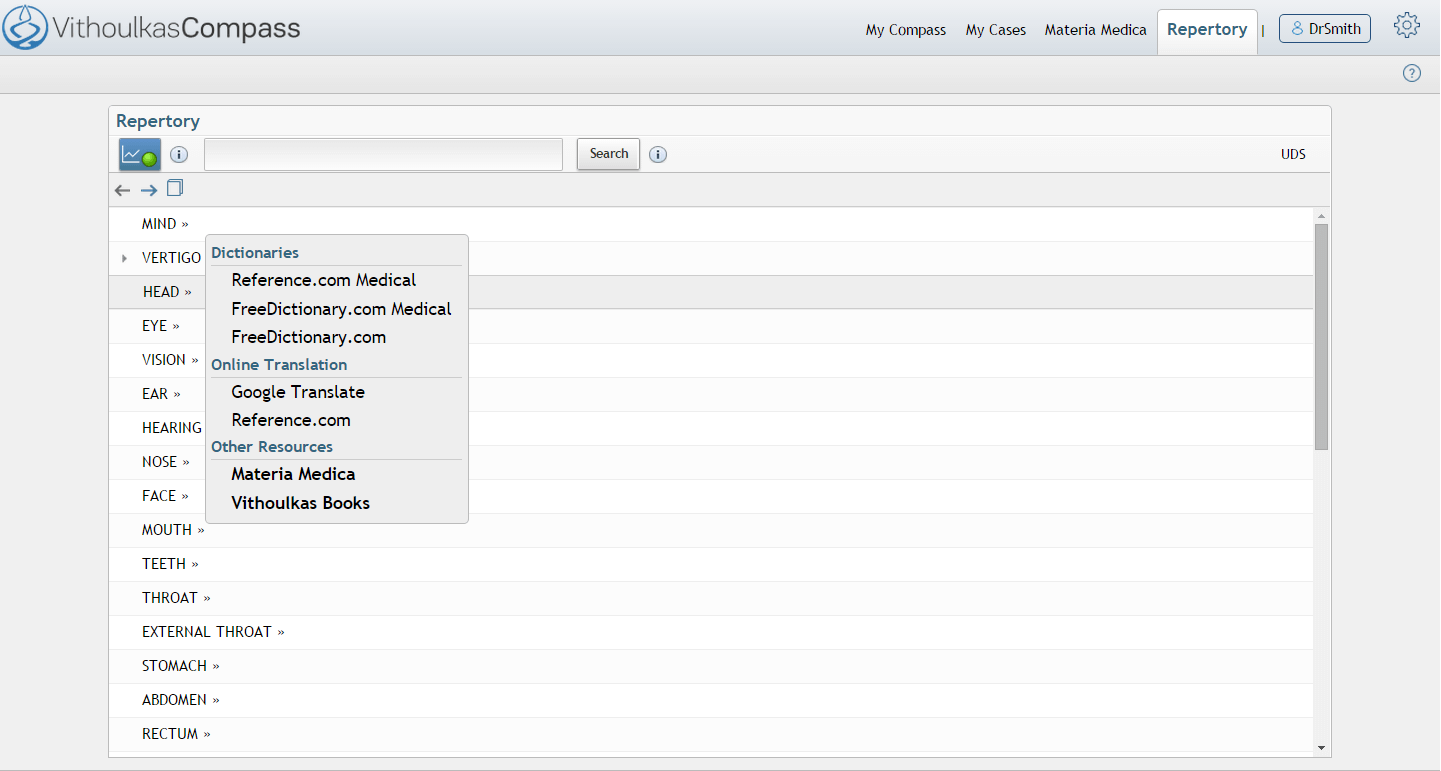
To facilitate you with Repertory terms and wording, use the VC Online Dictionary, Translation and Reference tool for the Repertory.
In the My Compass page – click on the Repertory tab and you can access the internet's finest dictionaries and translation facilities
Available Dictionaries:
- Reference.com Medical
- FreeDictionary.com Medical
- FreeDictionary.com
Online translations:
- Google Translate
- Reference.com
Other Sources:
- VC Materia Medica
- George Vithoulkas Books
Click on the button left of any rubric to display the remedies and just click on the ![]() icon next to the rubric text. Then click on the required dictionary or online translation and select the term(s). Find terms of the repertory in the VC Materia Medica books and George Vithoulkas Notes .
icon next to the rubric text. Then click on the required dictionary or online translation and select the term(s). Find terms of the repertory in the VC Materia Medica books and George Vithoulkas Notes .
You can also find any repertory word in the George Vithoulkas books online search tool.
Using the Materia Medica

To access the Materia Medica page, go to the top right of the window and click on Materia Medica which opens in a new window. By clicking on any remedy, you can read the different materia medicas we have available. The authors we have currently included are George Vithoulkas, Boericke, Clarke, Kent and Allen.
Adding your personal notes to a remedyIf you wish to add your own notes to a remedy click on the My Notes tab and then click Add notes to add your own notes to a remedy. Type in your remedy notes, and then click Save Notes.
The ![]() icon indicates that you can effortlessly send remarks, questions or data concerning the Materia Medica, to the VC team.
icon indicates that you can effortlessly send remarks, questions or data concerning the Materia Medica, to the VC team.
How to create, manage and edit your cases
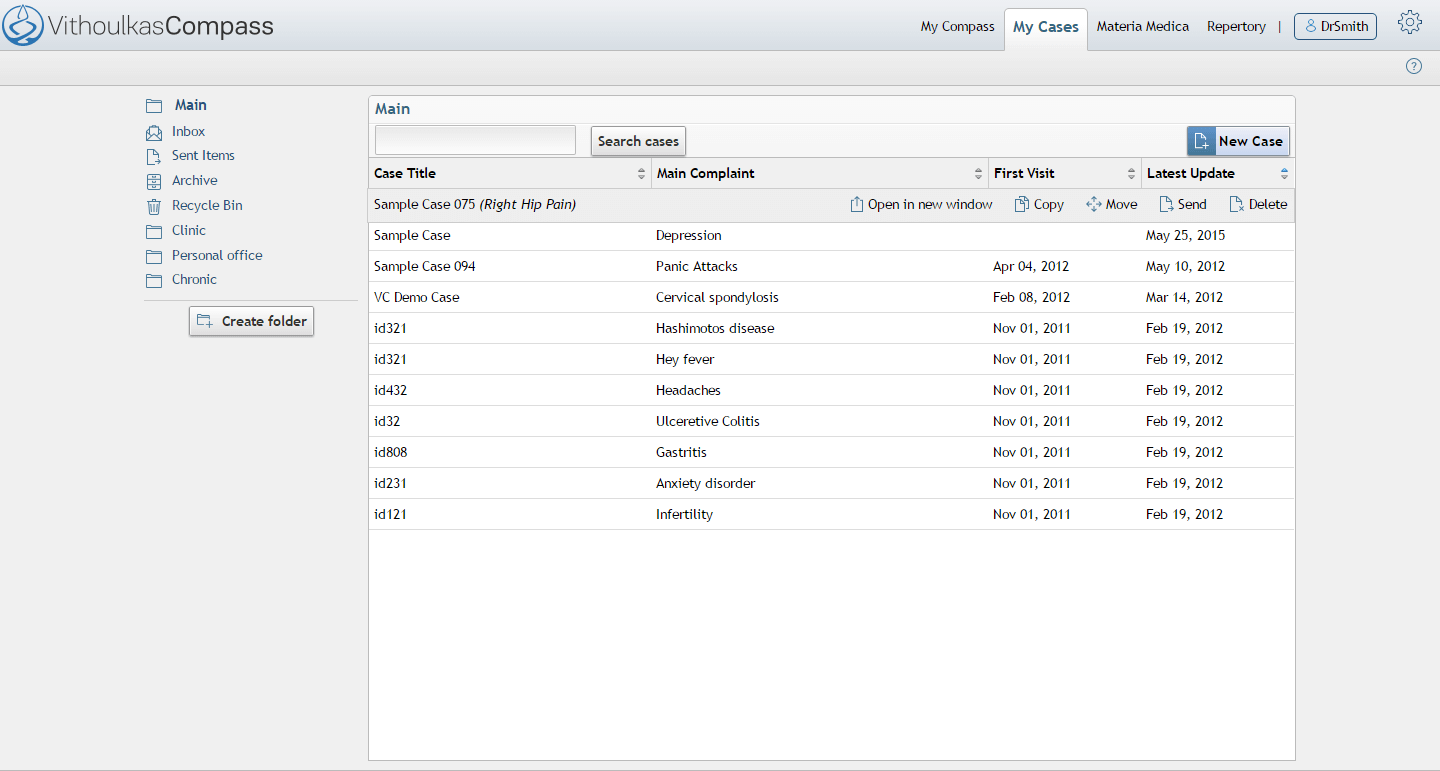
From the top main tabs, My Cases, takes you to the area where you can create and manage cases. This is where cases can be added, searched, opened for analysis, organized in different folders, or sent to other VC users.
By default, clicking My Cases will take you to the Main My Cases folder. The folder name is displayed on the top left of the cases list.
My Cases functions:
Creating a new case
Click New Case to create a new case
Fill in all your Case Details in the Create Case window
The case must include a case title and a main complaint. We suggest you fill in all fields
Click Create Case.
A new case will be created and you will be automatically taken to its Case History page.
Mousing over a case will also allow you to Open your case in a New Window (to work on more than 1 case simultaneously), Copy, Move, Send or Delete it.
To open an existing case
Mouse over your chosen Case and open the case by clicking anywhere except the displayed options. You will be taken to the Case History page for the opened case
Mousing over a case will also allow you to Open your case in a New Window (to work on more than 1 case simultaneously), Copy, Move, Send or Delete it.
Create Folder and Subfolders
You can organize your cases in different directories by creating folders.
In the My Cases area click Create Folder
Enter the desired Folder name and click Create Folder.
Once created a folder, upon selecting it, you can create Subfolders, again by clicking the Create Folder button.
On every folder if you mouse over the gear wheel icon  , you have the option to Rename and Delete the Folder.
On deleting a Folder, all cases included will be deleted as well.
To copy or move a case
Select the appropriate folder you want to Copy or Move the case to and Click Ok
Send/Receive case
This feature allows you to send cases to other VC users. These are received in their Inbox. Mouse over the Case and click Send. Enter the recipient username or user list and if you like, a Comment, and then click Send Case.
Cases that are sent to you from other VC users will appear in your Inbox folder, whereas cases that you send to other users are listed in your Sent items.
You will receive a notification each time a new Case is sent to your account and an email (if the option from My compass/My Preferences is enabled)
In order to preserve the original content, received cases have to be copied to another folder to be opened. In order to do so, mouse over the case, click Copy and select the folder you wish to copy the case to.
Received cases can be automatically copied to the Main folder by activating the relevant option in My Compass/My Preferences.
Delete Case
If you want to delete a Case, in the My Cases area, mouse over the Case and click Delete.
A notification Warning will appear on your screen. If you are certain that you want to delete the case, click Ok. The case will be moved to the Recycle Bin folder.
Restore Case / Permanent Delete
If you click on the Recycle Bin, a list displaying all deleted cases will appear.
To restore a case back to the original folder where it was located before its deletion, click Restore.
To permanently delete a case from the recycle bin, meaning that this case will be permanently deleted from your account, click Permanent Delete. A notification Warning will appear on your screen. If you are absolutely certain that you want to delete the case, click Ok.
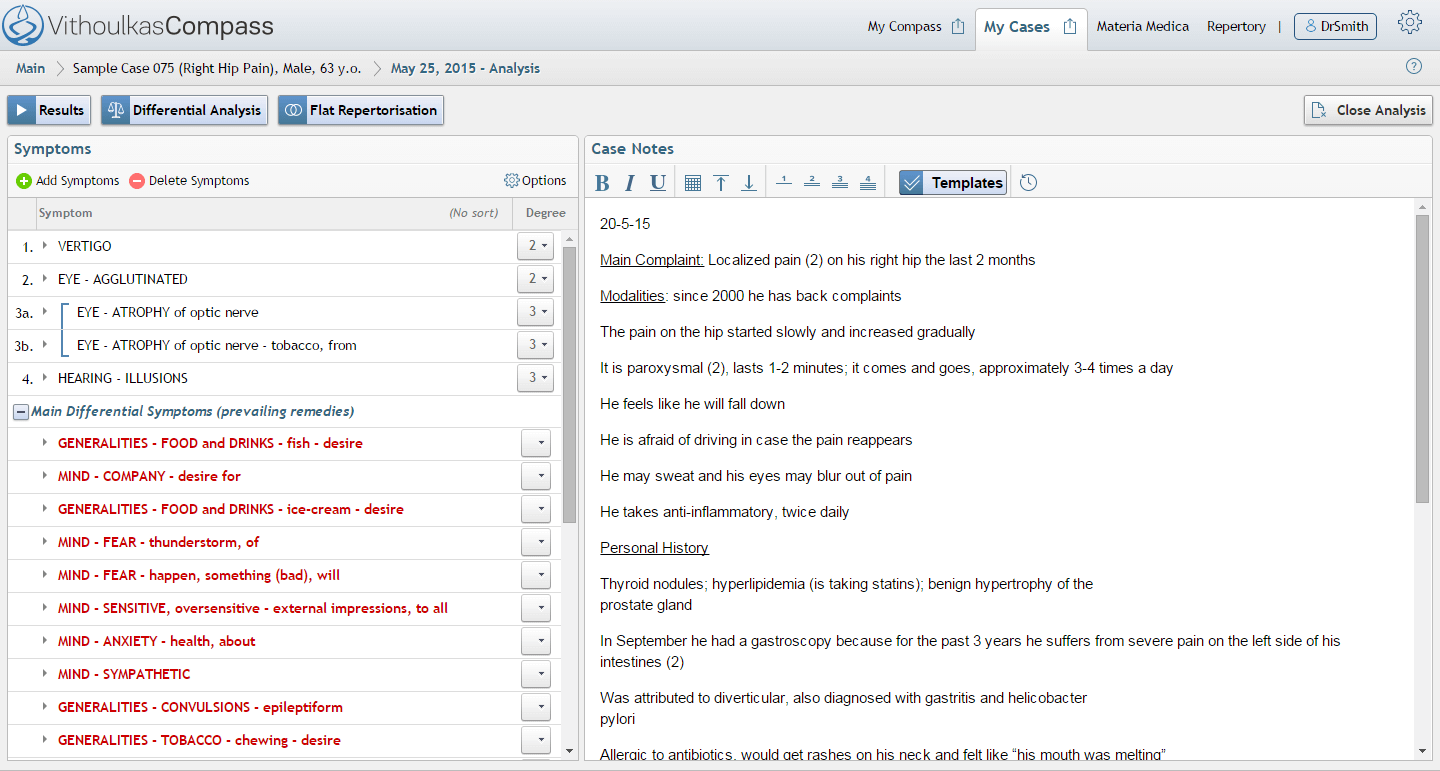
Case Notes
Your case notes are your personal notebook for your patients’ history.
When you type in your Notes, you can format your text – in Bold, Italic and Underlining (not available in mobile devices)
You may insert the date, underline your symptoms with a Degree of 1/2/3/4, Scroll to Bottom or Scroll to Top, similar to a typical word editor
Please note, Case notes are autosaved every minute. If you close your window prior to the autosave, you input will be lost.
Restoring Case Notes
In case of an accidental erasing of case notes, you may Restore Case Notes and return to an earlier version of your Case Notes.
You can also see the list of available revisions. VC stores the Case Notes of your last 3 sessions for each case. (It stores up to 10 revisions of your current VC session, saved at intervals of up to 1 minute).
Select, review its contents and click Restore. This will replace any content you have entered in your Case Notes with the content of your selected revision
Consultation Templates

To help you in the recording of your patients’ history, we have created a number of Consultation Templates that serve as a guide or checklist in your consultations.
VC Templates
To insert a VC Consultation Template, on the right of the Case Notes toolbar, click Templates and select one of the System Templates or a Personal template from the list of patient-specific templates for special cases and pathologies.
Personal Template (My Templates)
Personal tempates will appear in your Case Notes editor, exactly like system templates.
To create your own Template click on My Templates
Then click on Add Template in the drop down menu.
You will then be redirected to the My Preferences section in the My Templates page.
Click Add Template to create your own template and fill in your personal template title and with your desired text here in the text editor. Click on Submit and your new template is ready.
You can mouse over your personal template if you wish to change its title or text. Click View and re-enter your template to edit your text or title and then press Submit.
To delete your personal template, mouse over your template and click Delete.
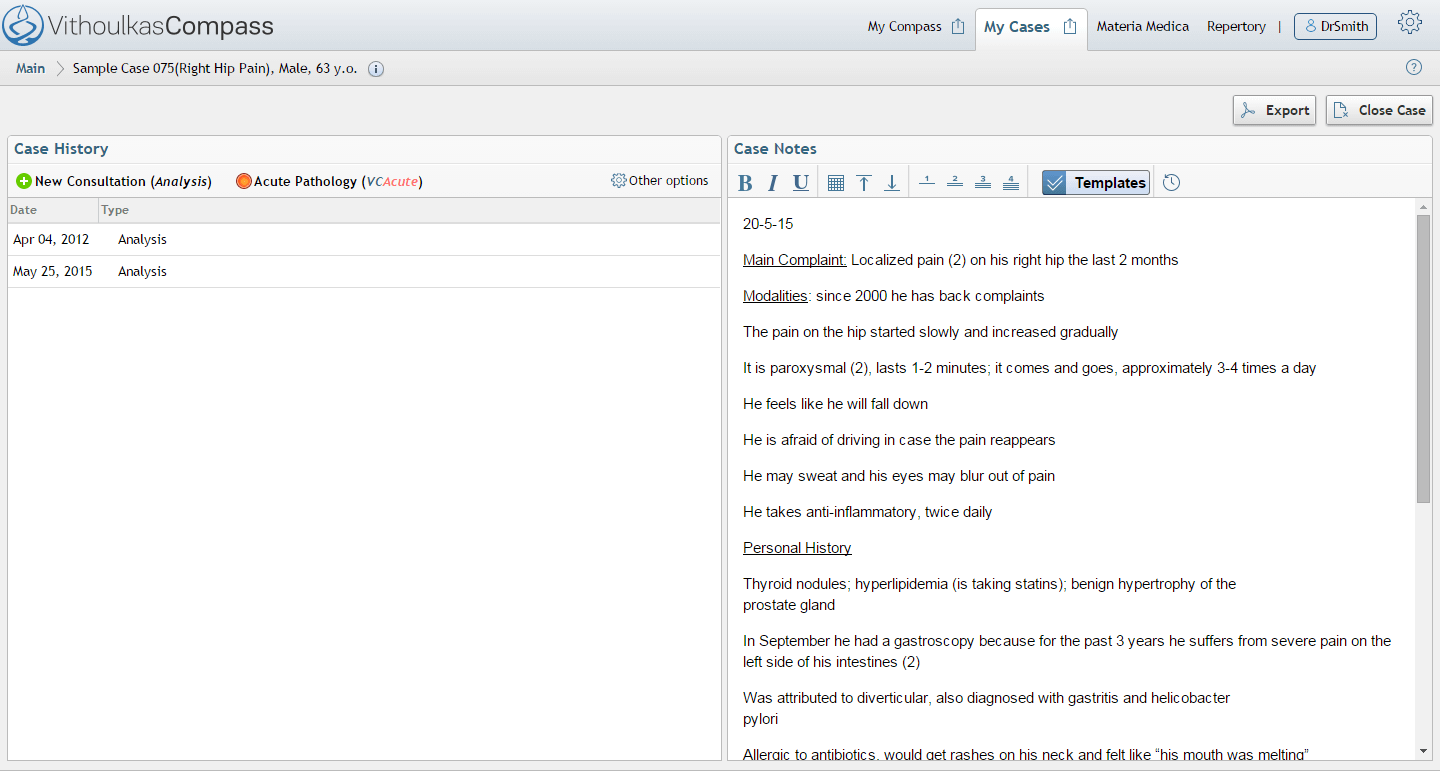
Case History Page

Creating a new case or opening an existing one will bring you to the Case History page. From there, the entire history of the case is visible along with the case notes.
The case history page displays the previous analyses, prescriptions, follow-ups, patient communication notes and all acute events, in historical order. Every one of these events is accessible by clicking on it.
The 2 main functions in this page, when working on a case are:
The ![]() New Consultation and
New Consultation and
the ![]() Acute Pathology buttons.
Acute Pathology buttons.
New Consultation
Whenever a patient consultation starts - clicking New Consultation will open:
- The Analysis page for you to begin adding symptoms to your new case
- Or the Follow-up for an already existing case if a remedy has been prescribed.
Acute Pathology consultation
In case an Acute Pathology consultation is required clicking Acute Pathology will directly open the expert system Analysis page.
In your Case History page, Case Notes are readily accessible for taking notes, using templates and editing.
The Case History pane shows the complete history of your case. On the right, are your case notes. The case history page shows the analyses, the prescriptions, the follow-ups, the patient’s communication and all acute events in a chronological order.
For Additional Case History events
To record a prescription as a case history event (without analysis)
1. Click Other Options on the right of your Case Analysis, and select Add Prescription.
2. Type in the formal name or abbreviation of the Remedy. An auto-complete list of the remedies will appear. Select the desired remedy, type in the prescription details and any comments you may have and Click Save.
3. You have recorded a Prescription as a Case history event.
Patient Communication
You can record a patient communication about the prescribed remedy or about a follow up, for example, as a Case history event.
1. To do this, again click the icon Other Options and select Communication.
2. Type in your Patients’ feedback in the Comment field. Click Save.
3. (You have added the Patients’ Communication as a Case history event).
Edit the Case history Event Date
Here you can edit the date of any Case Analysis, Follow-up, Prescription or any other Case History event
1. Again, click Other Options and select Edit Event Date.
2. Choose the Event you wish to edit, change the Date and click Save. If you wish to abort this process, you can click Cancel.
Please note, new event dates cannot change the order of events.
To Delete Event
1. On Other Options, select Delete Event.
2. Choose the Event you wish to delete and click Delete Selected. If you wish to abort this process, you can click Cancel.
How to Modify your Case Data
1. On the top left of your Case History page, mouse over and click the Case Title or the information icon ![]() to modify your Case Data
to modify your Case Data
2. The Case Data form will open.
3. Click Edit to modify your Case Data. Here you can modify the Case Title, the Main Complaint and all other Case Data.
4. Click Save, and then Hide to close the Case Data pane.
The Analysis page / Selecting and Managing symptoms in VC
Here you can add and manage your case symptoms towards and proceed with your case analysis
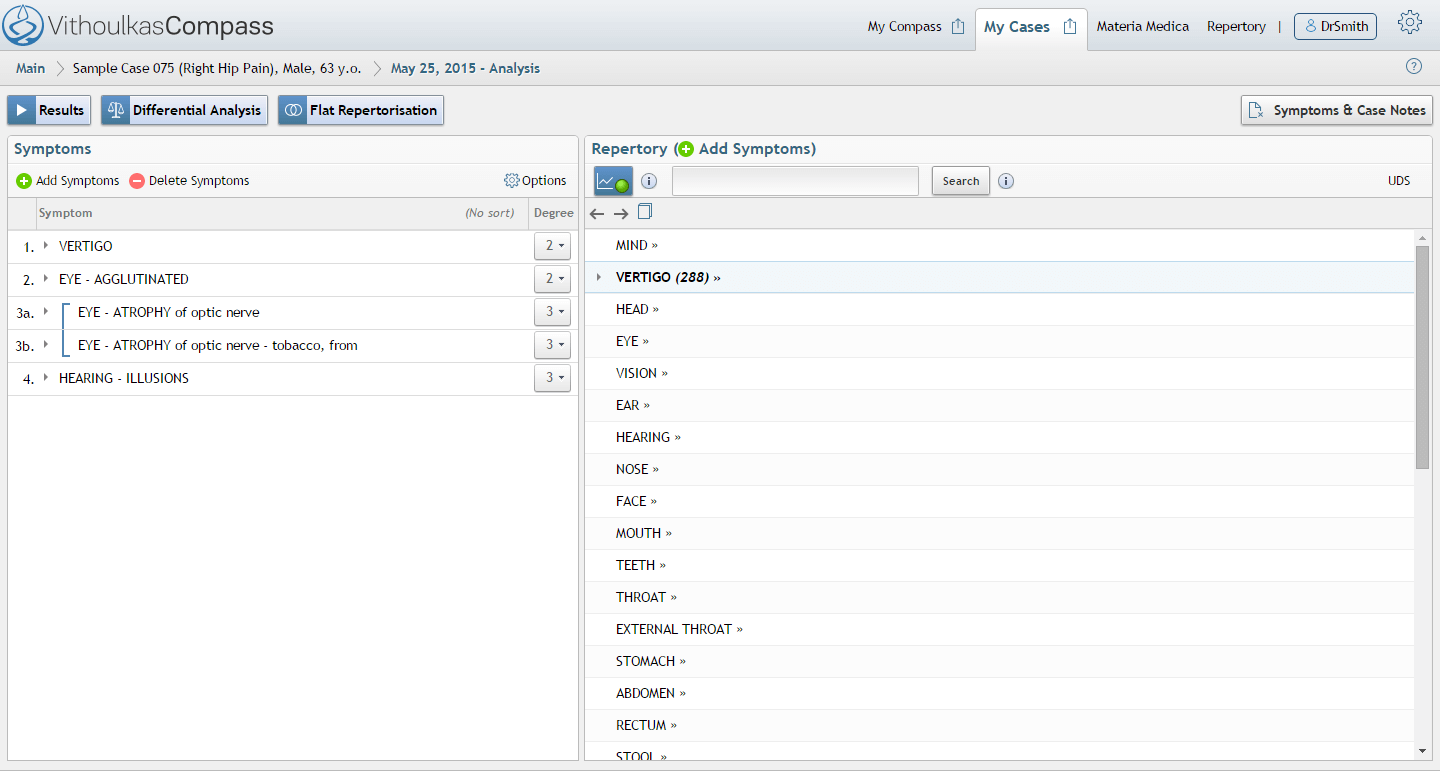
To add symptoms
To begin adding symptoms to your Case, click “Add Symptom”. The VC Repertory will appear. Navigate and search the Repertory according to the Repertory Help Chapter (see below)
Move the mouse over the required rubric and click on the Symptom’s degree - according to the intensity of the patient’s symptom - in order to add the rubric to your Analysis. The Rubric will automatically be saved in the Analysis' Symptom list.
You need to have at least 4 symptoms added to your Analysis to consult the Expert System about proposed remedies. For the Flat Repertorisation function this is not required.
Having entered all the symptoms, you can now consult the VC expert system for the proposed remedies by clicking on Solve or use the Flat Repertorisation.
To Delete Symptoms
Next to the Add Symptoms button, click on the Delete Symptoms button - if you want to delete one or more symptoms. You can do this, by selecting the checkboxes on the left hand side of the symptoms you want to delete.
After, just click Delete selected to delete or click Cancel to exit the delete symptoms mode.
Sort Symptoms
To sort the symptoms entered, by order of Entry, by Chapter or Degree Descending, click on Options - and select your option from this Drop down menu.
Include or exclude symptom/s for the Solve process
This function will help you view different variations of the case without altering it.
To include or exclude symptoms from the Solve process, click Options then click Symptom On/Off from the Drop down menu. Click on the check boxes and select or de-select the desired symptoms.
Merge Symptoms
The VC expert system will work correctly when rubrics referring to the same symptom have been merged.
You must use the Merge symptom functionality when you need to either create a group of rubrics that refer to the same symptom or when a combination of symptoms best describes the symptom the patient has reported. Each Merged symptom group will be considered as one symptom by the expert system during the repertorisation process.
To merge or unmerge symptoms, mouse over Options, and then click Merge Symptoms. Click the check boxes to select the desired symptoms you would like to merge. Click Merge Selected to create a new merged symptom or click Unmerge Selected to remove the selected Symptom/s from any merged symptom they are part of. You may click Cancel if you wish exit the Merge Symptoms mode.
Copy Analysis
When working with an older analysis, to create a copy of the analysis with today's date, preserving the old analysis, click Options, then click Copy Analysis. You will be automatically transferred to the new analysis (with today’s date) to continue working with case.
The Follow-up
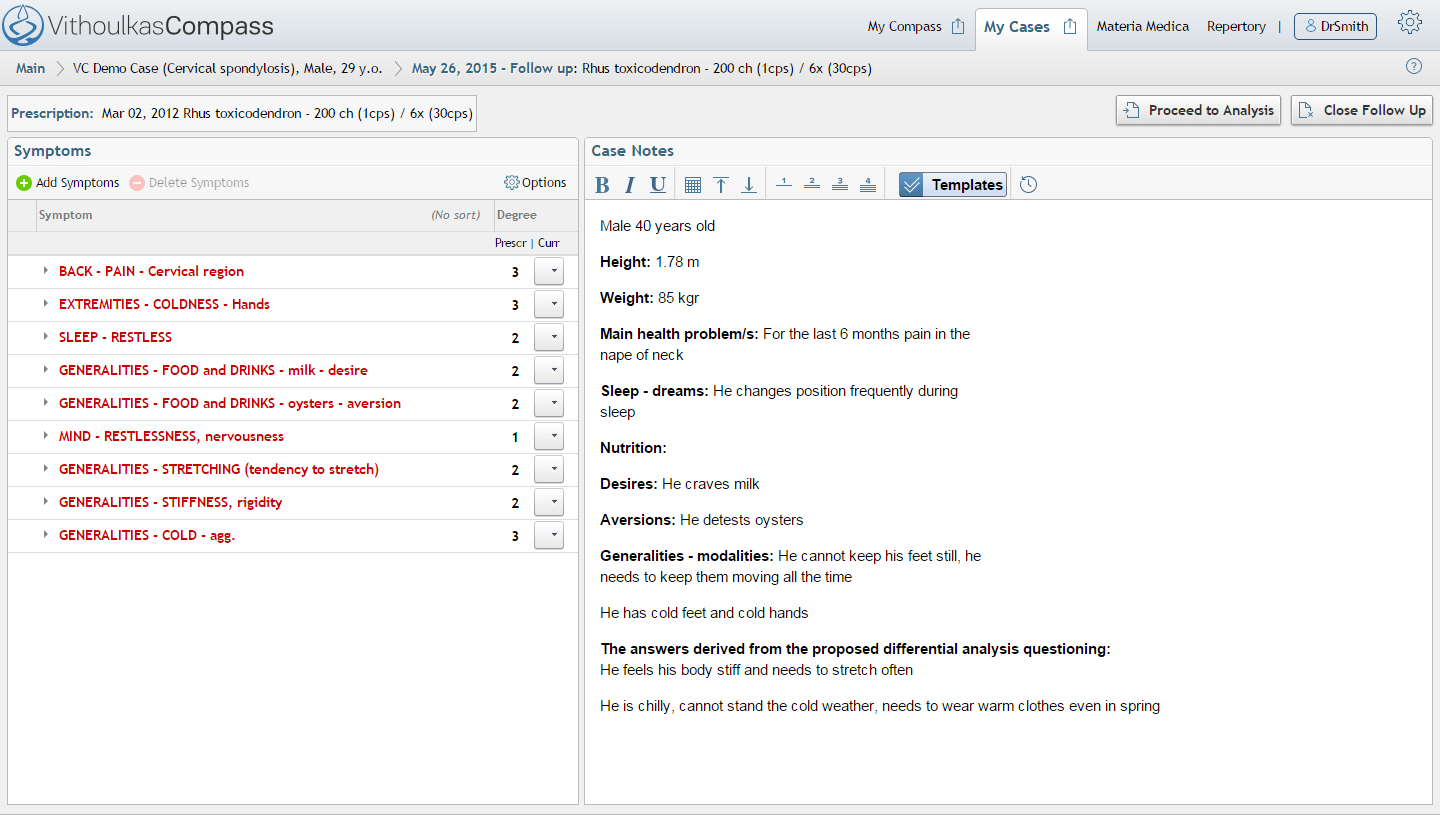
Whenever pressing the New Consultation in a case which you have previously prescribed a remedy, VC will automatically take you to the Follow up page for this prescription. Here all previous symptoms will be displayed as they were inserted at the time of the previous Consultation and Prescription. The user is asked to fill in the new weights of these symptoms in order to proceed to the new Analysis of the case.
The Follow-up process:
The symptoms with the degrees of your previous consultation will appear in red.
Re-evaluate the case symptoms and update them with the new degree by clicking the degree on the right of each symptom.
- For symptoms that do not apply to your case anymore, select the degree“0”. These symptoms will be deleted from your next Analysis. You may add new symptoms which come up but we advise you to do it after starting the next Analysis.
- Then click on the button Proceed to Analysis on the top right of your window.
- The Prescription Feedback will pop up on your screen.
- Enter the Overall Remedy Effect of the remedy you had prescribed along with the evaluation of the initial aggravation and click on Proceed to Analysis.
- The present symptoms in your case will now appear in your new Case Analysis with the adjusted degrees.
The VC Expert System Results page

After completing the symptom collection and clicking on Solve the results page appears. Immediately visible are the candidate remedies ordered by descending score and the Repertorisation info list. This list contains indications and warnings about your Repertorisation.
Candidate remedies list
Above the candidate remedies list , there are 4 tabs:
On the first tab you can see All of the proposed remedies
click Large to see only the large proposed remedies
click Small to see only the small proposed remedies.
Click Notable to see remedies that are below the 5th position of the proposed remedy list, yet, in cases where the required remedy proves difficult to confirm, might require some special attention because they may have 1 or more keynotes or specific symptoms within your Case Analysis.
Analysis of remedy suggestion: “Based-on” and “Not Present” rubrics
To the left of any remedy, click the Plus icon ![]() to see the analysis of this specific remedy suggestion. In order to see the remedies of a “Based-on” or “Not Present” rubric, click on this arrow located on the left of each rubric. The symptoms, on which the proposed remedy is highly dependent on, appear in red.
to see the analysis of this specific remedy suggestion. In order to see the remedies of a “Based-on” or “Not Present” rubric, click on this arrow located on the left of each rubric. The symptoms, on which the proposed remedy is highly dependent on, appear in red.
Next to each of these “based on” and “not present” rubrics, you can see the degree you have given for this rubric in your case analysis in your symptom list and next to that the remedy degree in the repertory.
In this list you can click on icon ![]() to display the remedies for a rubric and you can also click on any remedy name to display the Materia Medica.
to display the remedies for a rubric and you can also click on any remedy name to display the Materia Medica.
To consult the Materia Medica within the Results page
To the right of a remedy, you can click the Book icon ![]() to consult the Materia Medica (which will open in a new window). Similarly any visible remedy name can be clicked to open the Materia Medica.
to consult the Materia Medica (which will open in a new window). Similarly any visible remedy name can be clicked to open the Materia Medica.
Dynamic Repertory Metadata
Whenever available, next to selected remedies, there is the icon  of the Dynamic Repertory Metadata. By clicking it, distinctive information on remedies and symptoms are displayed, to help you differentiate remedies proposed in your solution according to fine nuances, ‘flavors’ and subtle behaviors.
Repertorisation information – Quality checks
In this area, the results of several repertorisation quality checks are displayed as notifications and warnings. Clicking on the + signs displays more information and suggestions to the user for proceeding in the Analysis and improving the Repertorisation.
Adding a Prescription
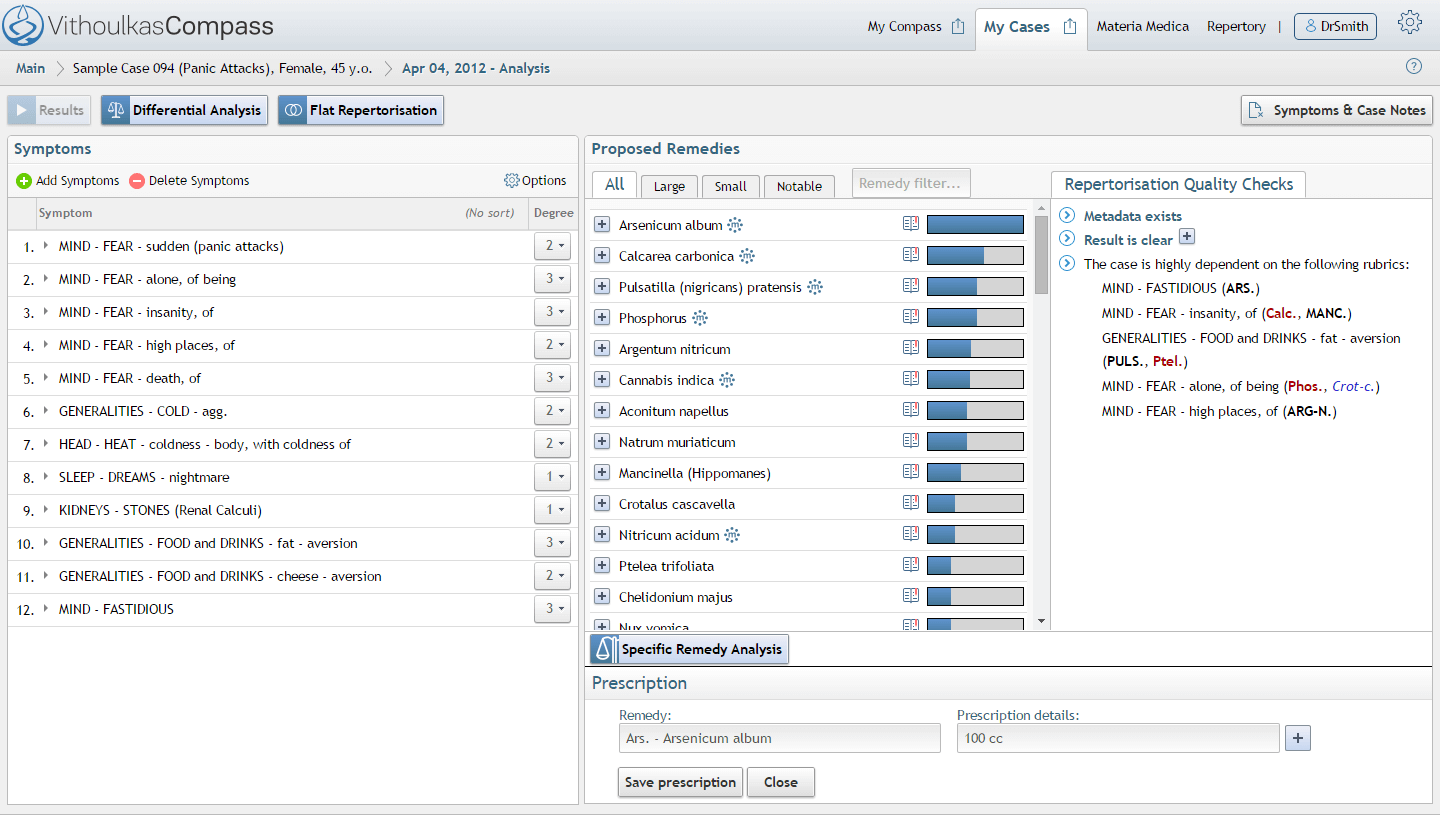
When the user has decided which remedy to prescribe the fields at the bottom of the result page can be filled with the remedy name and the prescription details, such as potency.
Always consult the material medica and your own sources before considering a prescription.
Click the remedy name you want to prescribe and the remedy will be entered automatically in the remedy text field. Alternatively type the name in the field and select from the displayed remedies.
Next add the prescription details (required) and click on Save prescription. Then read the disclaimer and, if you agree, click I accept.
PLEASE NOTE: Vithoulkas Compass is a consulting aid for homeopathic practice and should be used accordingly. The full responsibility for prescriptions lies with the practicing homeopath. All suggestions much be cross-checked with other sources of knowledge according to the practitioner’s training.
You will then be redirected back in your Case Overview page where you can now see the recorded prescription in your Case History pane.
Printing a Prescription
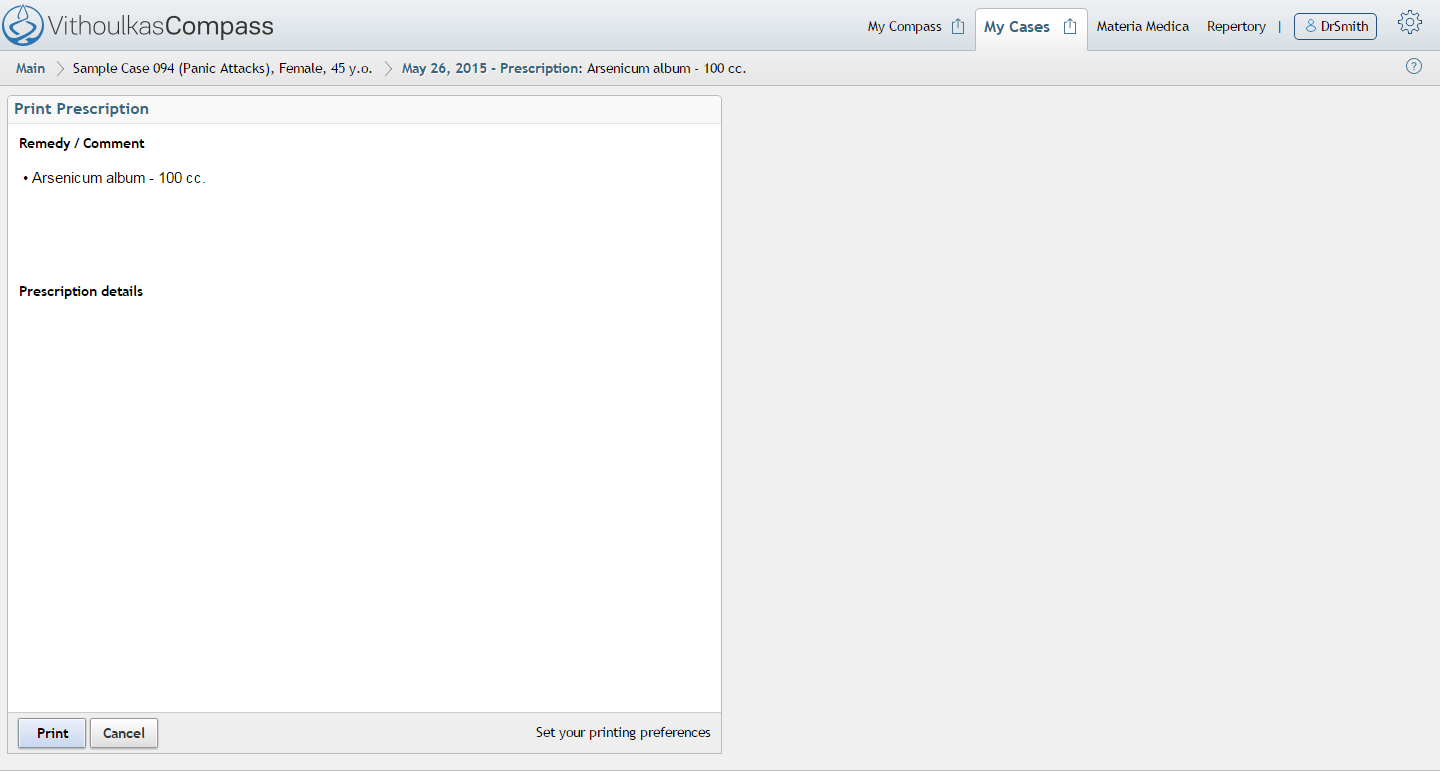
After prescribing a Remedy, you have the option to Print the Prescription for your patient.
On the top part of the pane, you have pre filled the Prescription selected.
On the bottom part of the pane, you may add any details or comments you wish on free form text.
When you are ready, press the Print button below.
If you are not satisfied with the printing result or you want to customize further, click on the Set your printing preferences option on the bottom left of the pane, and you will be redirected to the My Preferences main section, where you have the ability to edit the Print Header Type and the accompanied text.
Using the Differential Analysis function
The Differential Analysis function in VC is a valuable tool in coming closer to the correct remedy for a case. It provides appropriate symptoms for patient questioning in order to confirm or discard candidate remedies. After having pressed Solve, the proposed remedies appear on your screen.
Click on Differential Analysis. The proposed symptoms appear in red, below the added symptoms in your analysis, on the Symptoms page. To add a proposed symptom to your case after confirming it with your patient, simply select the appropriate degree.
The Differential Expert System (DES) analyzes the most probable remedies and provides rubrics in 4 different categories.
The first category consists of the Main Differential Symptoms. This category is displayed open by default.
- The Main Differential Symptoms include the most important differentiating symptoms of the prevailing remedies of the results list.
Ask the patient about the proposed rubrics and choose all the rubrics you confirm from your patient. Click on the degree according to the intensity of the patient’s symptom in order to add the rubric to the Analysis.
To open the next 3 categories click on the ![]() icon on the left of each.
icon on the left of each.
You can display:
The Main Keynote Symptoms
- In the Main Keynote Symptoms, the first 5 remedies of the results list appear in order of score in the results. When clicking on any of these remedies the most important keynote symptoms of the remedy expand below.
The user can try to confirm the remedies with the patient and add symptoms where necessary with the appropriate degree to the Analysis.
The Case-Specific Differential Symptoms
- The proposed Case-Specific Differential Symptoms are closely related to rubrics already present in the Case Analysis. These rubrics are the result of a complex repertory search which traditionally takes considerable time but with VC is performed instantaneously and accurately. The displayed symptoms, when confirmed by the patient, will differentiate the candidate remedies and confirm the most probable.
Small Remedies Symptoms
- Small Remedies Symptoms are confirming rubrics for small remedies that come up in the case. The displayed rubrics are other keynote symptoms of these remedies and they can be very helpful in discovering the correct remedy.
After selecting the appropriate rubrics, click Solve again in order to consult the expert system and receive a new proposed remedy list.
Using the Specific Remedy Analysis function

The Specific Remedy Analysis will help you differentiate remedies from the proposed remedy list and to check the repertory for symptoms of any remedy. You may contain the symptom search to specific repertory chapters, or important subchapters, and optionally to locate symptoms containing specific keywords. These functions can be invaluable to the user for confirming and comparing remedies in a case.
How to perform Specific Remedy Analysis:
After having repertorised your case, by pressing Results the proposed remedy list is being displayed on the right of your screen. Then click Specific Remedy Analysis at the bottom of the proposed remedies list.
On the left of the remedies list, click the check boxes of the remedy or remedies (up to 5) you would like to select for the Specific Remedy Analysis and click Proceed.
Please note that selecting only one remedy enables a repertory search for symptoms of this remedy and does not return differentiating symptoms.
The proposed symptoms appear in red, below the added symptoms in your analysis, on the Symptoms page. To add a proposed symptom to your case after confirming it with your patient, simply select the appropriate degree.
The proposed symptoms are displayed in 3 categories:
- The Main Differential Symptoms show us the most characteristic and differentiating symptoms of your selected remedies.
Go through the proposed symptoms. Choose the symptoms you can confirm for your patient and select the appropriate degree to add it to your analysis.
- Under Main Keynote Symptoms you can see the most important keynote symptoms of the selected remedies, grouped under each remedy’s name. Again choose the symptoms for your patient and enter the to add it to your patient’s analysis
- Under proposed Case-Specific Differential Symptoms you can see rubrics that are closely related to rubrics already present in your case analysis.
If required click the appropriate degree to add any symptom you have confirmed for your case and click Solve for the proposed remedies.
Limiting the search to specific Repertory Chapters
After clicking Specific Remedy Analysis and after having selected the remedy or remedies you would like to analyse or differentiate, you can select specific repertory chapters or subchapters (using the “+” button) to limit the proposed questions.
Limiting the search to specific Keywords and/or Repertory Chapters
If you want to limit the proposed symptoms to those containing specific keywords you can optionally enter desired terms into the Keyword text field below the Repertory chapters list. The Differentiating Expert System will only propose symptoms that contain the keyword/s you have entered. For example, in cases where the results can be further clarified or if a remedy needs additional confirmation, you can search for the rubrics which contain terms or any other keyword such as ‘alcohol' or 'morning' or 'right knee' for one or more remedies.
Once clicking on Proceed the results are displayed in order of importance for the calculation of the remedy scores.
If required click the appropriate degree to add any symptom you have confirmed for your case and click Solve for the proposed remedies.
Using Flat Repertorisation
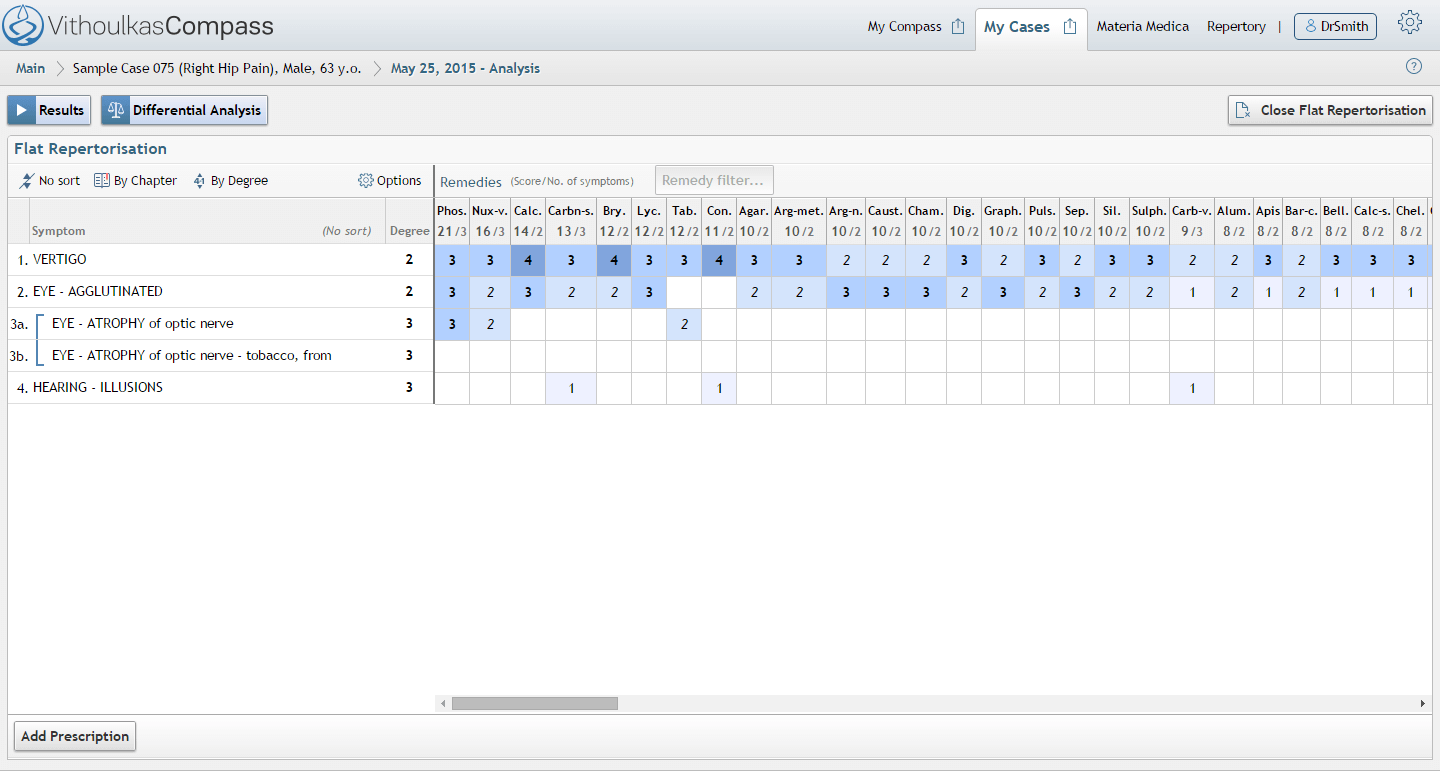
Here you can conduct Flat Repertorisation in three different possible ways, which you select by mousing over “Options”.
On the left, the option is offered to sort the symptoms either by Chapter or by Degree.
The results of the proposed remedies are displayed on the matrix.
You can further sort the symptoms by Remedy degree, by clicking the desired remedy on the matrix.
You have also the option to filter the matrix by typing the code of a remedy.
Exporting a case to PDF file
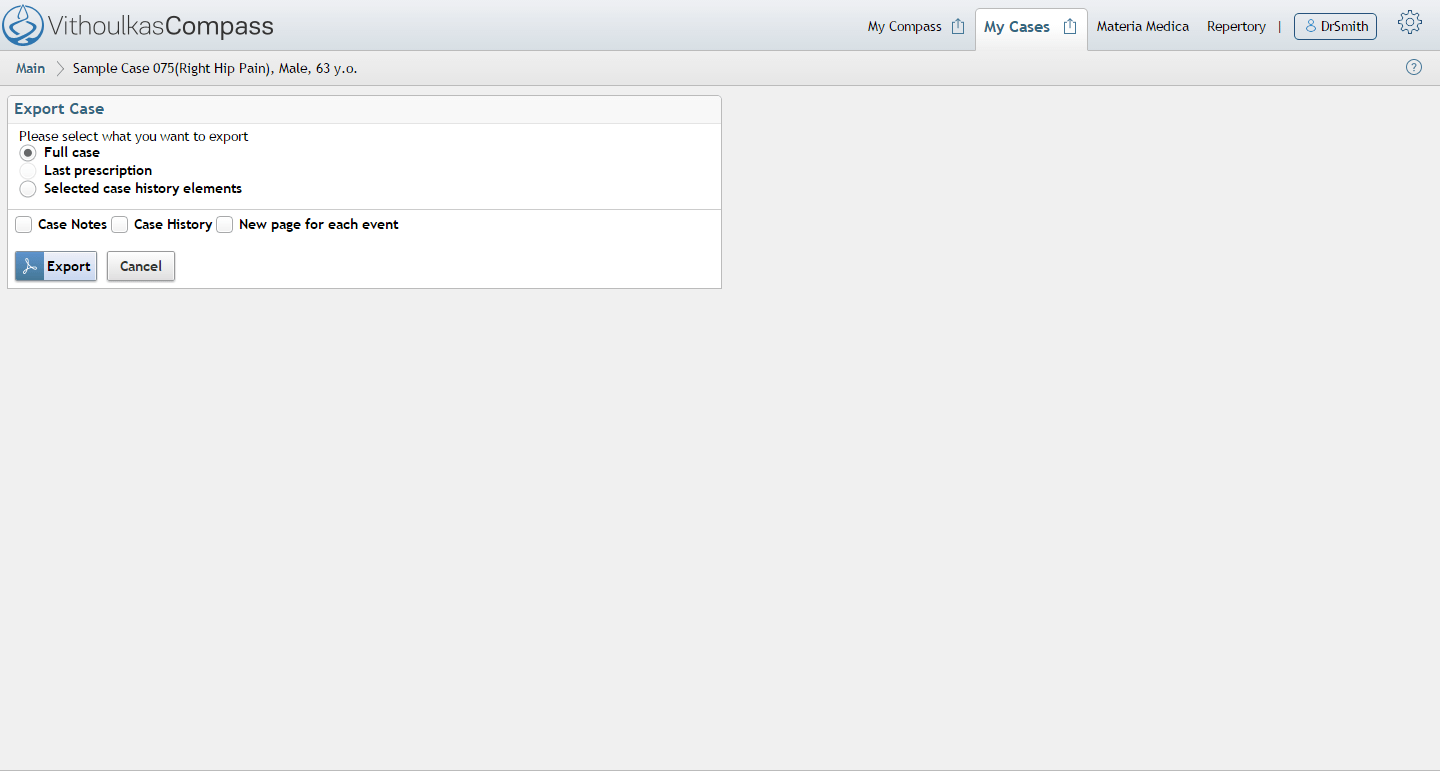
Cases or parts of them can be exported to files in PDF format on your computer for printing of filing.
On the top right of your Case Notes page, click “Export”
Select what you would like to export from these options:
- Full case
- Last analysis and prescription or
- Selected case history elements
Click the Checkboxes as required to include the Case Notes or the Case History
And on the bottom left, click “Export” to Export the case
Become active member of the VC project
Is a rubric’s meaning not clear?
Are there duplicate or very similar rubrics which create confusion?
Is there any possible or obvious mistake in the repertory?
Do you think a rubric is missing from the VC repertory?
Any suggestion for inclusion in the Dynamic Repertory Metadata?
Any other question, comment or suggestion concerning the repertory, material medica or VC in general?
VC v2.0 includes functions which enable users to effortlessly send remarks, questions or data concerning specific rubrics of the Repertory, the Dynamic Repertory Metadata and the Materia Medica, to the VC team.
This icon ![]() in different areas of VC indicates this easy way of user input.
in different areas of VC indicates this easy way of user input.
More specifically:
for the repertory
for the material medica
for the Metadata
for all cases
We welcome you to join and send us your questions and contributions and the VC team will review them as part of the work to continuously improve VC.
Of course users who provide valuable information or useful questions or remarks will be rewarded according to the contribution with extra usage credits or free subscription periods.